> ## Documentation Index
> Fetch the complete documentation index at: https://docs.xano.com/llms.txt
> Use this file to discover all available pages before exploring further.
# Custom Functions
> Build business logic once and reuse it in multiple places
**Quick Summary**
Custom functions are very similar to your APIs — they have inputs, a function stack, and a response. However, they can not be called externally. Instead, custom functions allow you to build something and use it in other places, while maintaining it in a centralized location.
## What is a custom function?
Custom functions can be thought of as a building block for the rest of your backend. You can build a custom function just like an API endpoint, and insert that custom function into other function stacks, giving you easily reusable logic while only having to maintain it in one place. When you make a change inside of a custom function, that change is automatically in effect everywhere you have chosen to use the custom function.
***
## Building and Using Custom Functions
From the sidebar, click Functions or hover over it and click to create a new function immediately.
 Give your custom function a **name**, **description**, **tags**, and choose your [Request History](/maintenance-monitoring-and-logging/request-history) settings.
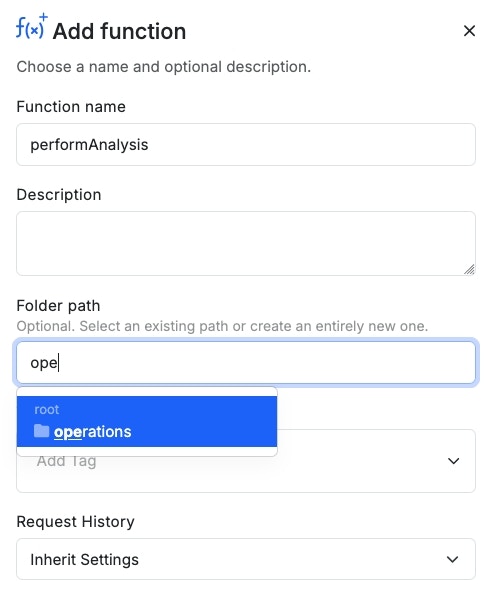
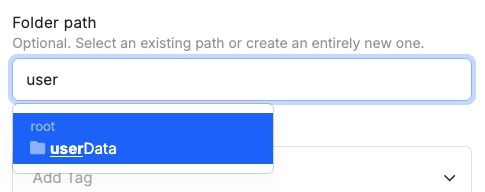
You can also choose to store your custom functions inside of a folder. If the folder already exists, just start typing the name and select it from the auto-complete. If the folder doesn't exist, you can create a new one from here.
Give your custom function a **name**, **description**, **tags**, and choose your [Request History](/maintenance-monitoring-and-logging/request-history) settings.
You can also choose to store your custom functions inside of a folder. If the folder already exists, just start typing the name and select it from the auto-complete. If the folder doesn't exist, you can create a new one from here.
 When you're done, click Save .
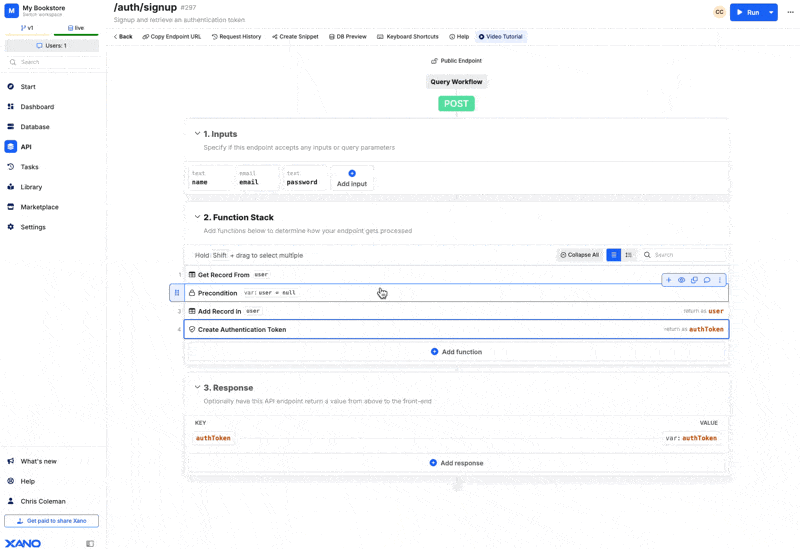
A custom function has three sections — the same as an API endpoint.
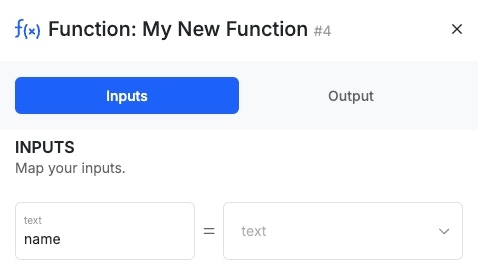
### ⬇️ Inputs
The inputs are anything that a function stack needs to run. For example, a function stack that logs in a user probably needs a username or email and a password; these would be the inputs.
### 🔄 Function stack
This is where all of the magic happens. All of the business logic that is performed lives here.
As you add functions to your function stack, it will suggest next steps based on most popular user activity.
### ⬆️ Response
Once the function stack has done its job, it needs to know what to return. This lives in the Response section.
### Insert your new custom function into other function stacks.
When you're ready to use your new custom function in other function stacks, click
When you're done, click Save .
A custom function has three sections — the same as an API endpoint.
### ⬇️ Inputs
The inputs are anything that a function stack needs to run. For example, a function stack that logs in a user probably needs a username or email and a password; these would be the inputs.
### 🔄 Function stack
This is where all of the magic happens. All of the business logic that is performed lives here.
As you add functions to your function stack, it will suggest next steps based on most popular user activity.
### ⬆️ Response
Once the function stack has done its job, it needs to know what to return. This lives in the Response section.
### Insert your new custom function into other function stacks.
When you're ready to use your new custom function in other function stacks, click
 , choose **Custom Functions** from the panel that opens, and select your custom function.
You'll be able to supply data for any inputs the custom function is expecting here.
, choose **Custom Functions** from the panel that opens, and select your custom function.
You'll be able to supply data for any inputs the custom function is expecting here.
 ***
### Creating Custom Functions from Existing Function Stacks
If you have a function stack that you'd like to convert into a custom function, you can do so in one of the following ways.
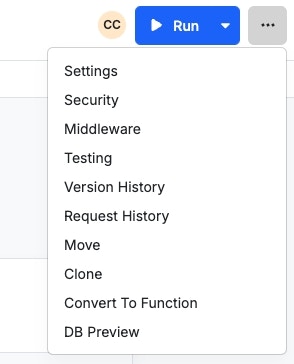
Click the three dots in the upper-right corner and choose Convert To Function
***
### Creating Custom Functions from Existing Function Stacks
If you have a function stack that you'd like to convert into a custom function, you can do so in one of the following ways.
Click the three dots in the upper-right corner and choose Convert To Function
 You can select a group of steps and click **Convert to Func** to convert those steps into a custom function.
 ***
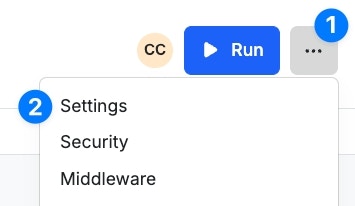
## Custom Function Settings
### From the Settings panel
***
## Custom Function Settings
### From the Settings panel
 | Name | Purpose |
| ---------------- | --------------------------------------------------------------------------------------------------------------------------------------------------------------------------------------------------------------------------------------------------------- |
| Name | The name of the custom function. |
| Description | An internal description, just for you. |
| Tags | Use tags to organize objects throughout your Xano workspace and find them later |
| Request History | - Inherit Settings: Use whatever is set in your workspace branch defaults
| Name | Purpose |
| ---------------- | --------------------------------------------------------------------------------------------------------------------------------------------------------------------------------------------------------------------------------------------------------- |
| Name | The name of the custom function. |
| Description | An internal description, just for you. |
| Tags | Use tags to organize objects throughout your Xano workspace and find them later |
| Request History | - Inherit Settings: Use whatever is set in your workspace branch defaults
- Other: Set specific request history settings for this Function
📖 [**Learn more about request history**](/maintenance-monitoring-and-logging/request-history) |
| Response caching | Cache the response and redeliver it during future runs
📖 [**Learn more about response caching**](/the-function-stack/additional-features/response-caching) |
***
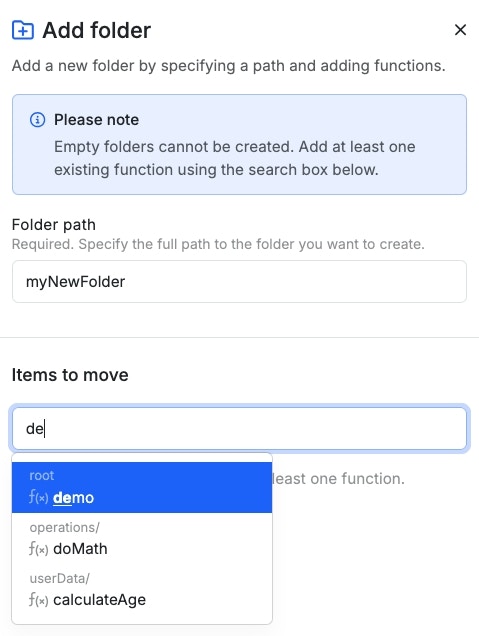
## Custom Function Folders
You can organize your custom functions into folders for better organization.
* Folders are not required if you prefer not to use them. You can store all of your functions in folders, or use a combination of folders and no folders.
* A folder requires having at least one function inside of it — empty folders are not supported.
When creating a new function, you'll be given the option to store it in a folder.
Just start typing the name of the folder. If it exists, select it from the auto-complete dropdown. If it doesn't exist, it will be created for you.
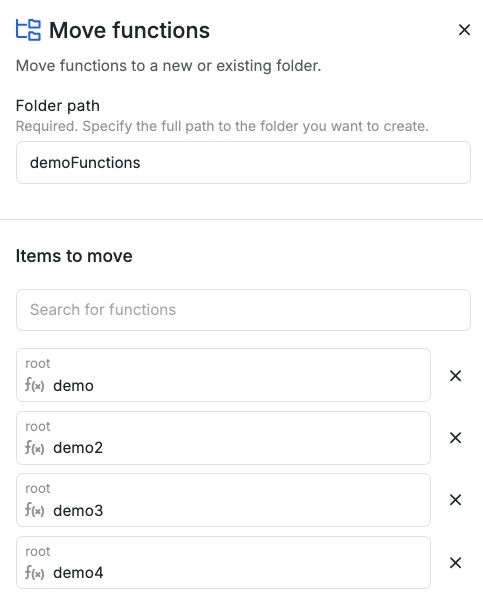
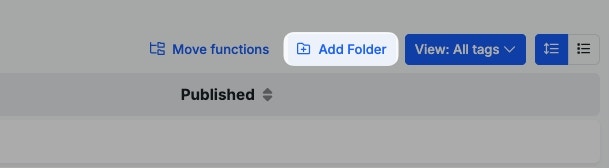
 Click the Add Folder button to create a new folder for your existing functions.
 Give your new folder a name, and use the autocomplete to select at least one function to add to it.
 Select the functions to move by using the checkboxes on the left-hand side, and click Move
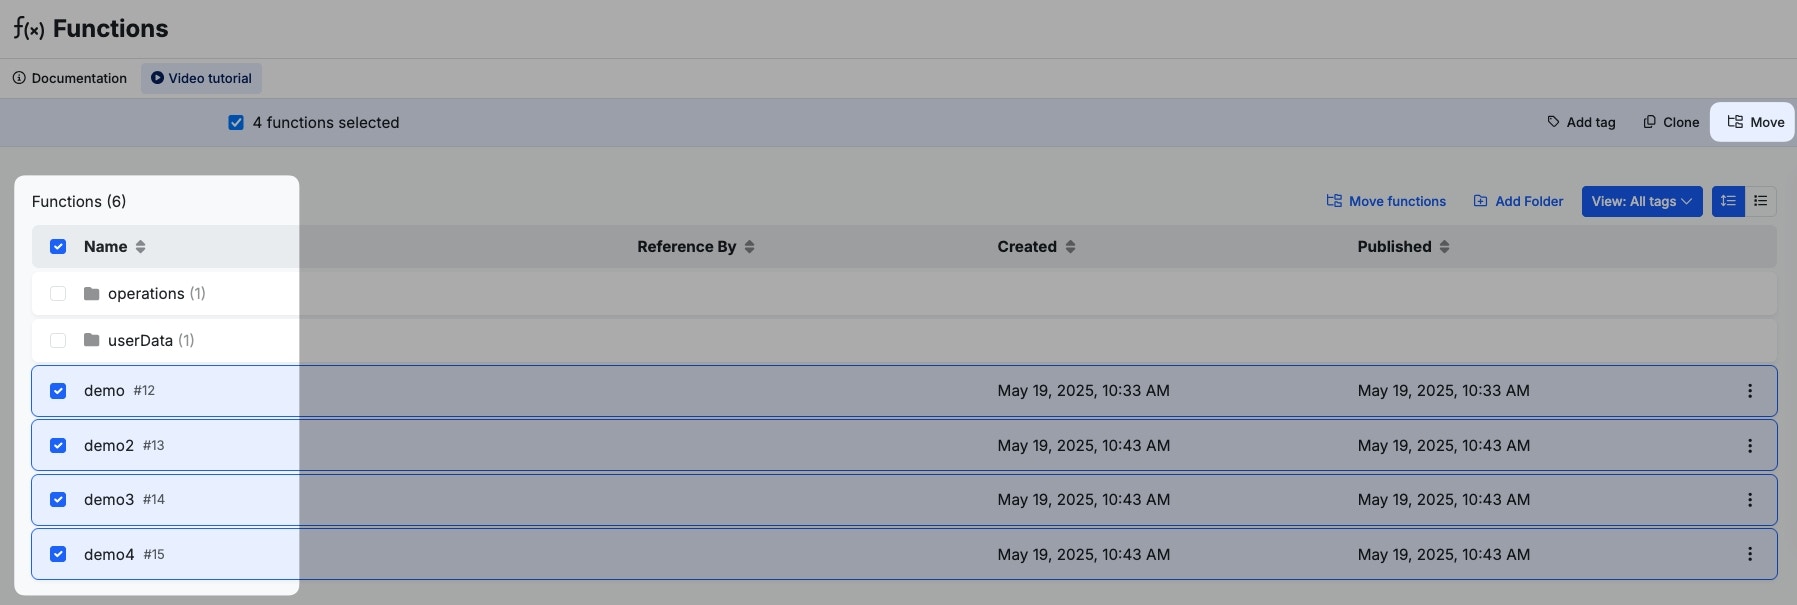 Type a new folder name, or add them to an existing folder. When you're ready, click Save